Dental Knowledge
-

English
-

Spanish
English
Spanish
Choosing the right dental bur isn’t always simple. With so many types available—clinical, laboratory, and milling. it’s easy to get confused. This guide will break down the differences, show how each type is used, and help you make better decisions for your practice or lab.
At their core, dental burs are rotary instruments designed to cut or grind hard materials. They attach to handpieces or milling machines and are built to handle everything from enamel and dentin to zirconia, titanium, or resin discs.
But here’s the thing—“dental bur” is an umbrella term. It doesn’t mean one single tool. A clinical bur, a lab bur, and a CAD/CAM milling bur all look different, serve different functions, and are made from different materials.
Think of it like shoes. You wouldn’t wear running shoes to a formal dinner, and you wouldn’t hike in high heels. The same goes for tools: the right choice depends entirely on where and how you’re using it.
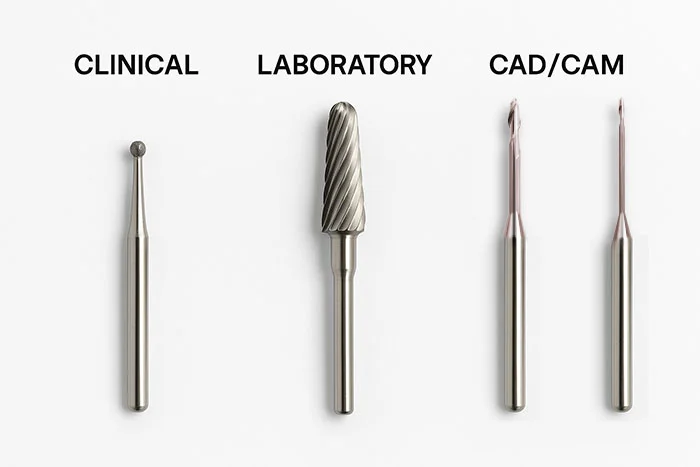
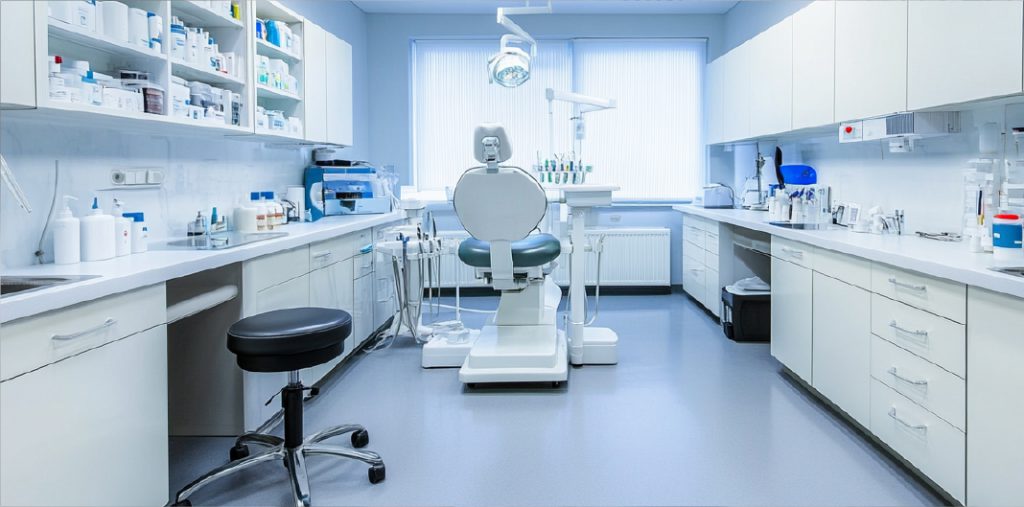
Clinical burs are what most dentists and patients recognize. They are small, precise, and built to work inside the mouth.
Most clinical burs are made of tungsten carbide or diamond burs. Carbide tools cut hard enamel efficiently, while diamond grinding tools provide smooth precision. Their shapes—round, tapered, pear-shaped, flame-shaped—match different clinical needs.
For example, a dentist preparing a class II cavity may start with a round bur to gain entry and switch to a tapered one for shaping walls.
Chairside time is precious. The right bur reduces heat, saves minutes, and improves patient comfort. A dull or wrong-shaped cutter can mean extra time, more vibration, and less accuracy.
In the lab, rotary instruments play a critical finishing role, ensuring every restoration is delivered with accuracy and polish.
Unlike chairside burs, lab instruments are typically larger and built for bench-top handpieces. They come in different forms—tungsten carbide, diamond-coated steel, or rubber-diamond composites—each chosen for its polishing or grinding ability.
Take an example: a technician finishing a zirconia bridge. They may start with a coarse diamond tip to reduce the material, then switch to a fine-grit rubber polisher to create a smooth surface. This step-by-step process ensures both precision and a natural, lifelike appearance.
Laboratories work in high volume, so durable cutting heads are essential to keep costs down and workflows smooth. But it’s not just about speed. Each restoration must meet proper occlusion and alignment. That’s why technicians move gradually from coarse to fine abrasives, polishing until the finish is accurate, natural, and ready to wear.
This is where technology takes over. Milling burs work in fully automated milling machines, shaping restorations directly from discs of zirconia, PMMA, Wax, PEEK, or even titanium.
In short, cutting heads carry the load of digital dentistry. They’re not about manual skill but machine calibration and tool design. A lab might rely on a 0.6 mm bur for fine occlusal details and a 2.5 mm cutter for roughing out the base.
Milling burs are consumables, and frequent replacement can get expensive. Choosing burs that balance longevity with accuracy is critical. A bur that cuts too aggressively might shorten tool life, while one that lasts long but dulls quickly risks poor fits.
With so many burs on the market, finding the right one can feel overwhelming. Follow these steps to make it simple:
1) Define Your Setting
2) Match Bur Type to Material
3) Balance Speed vs Finish
4) Check Shank & Compatibility
5) Ensure Cooling & Safety
6) Think About Cost per Use
7) Test and Refine
Tip: Always store burs properly, sterilize when needed, and replace them before they wear out. A dull bur slows you down and compromises safety—both for patients and restorations.
Here are some confusions that happen often:
Not all dental burs are the same. Clinical burs are designed for the chairside, lab burs for finishing and detail work, and milling burs for CAD/CAM machines. Knowing the difference is the key to efficiency, accuracy, and predictable outcomes.
At Ownsmile, we specialize in lab and milling burs engineered for zirconia, PMMA, and titanium. With the right tools in hand, technicians can work faster, reduce costs, and deliver restorations that fit perfectly.
👉 Discover Ownsmile’s specialized lab burs and milling burs, built for precision, durability, and confidence in every case.
 Dental Knowledge
 Dental Knowledge
 Dental Knowledge